Quick Start
Photo AI is available as a desktop application on both Mac and Windows computers. There is no mobile version at the moment due to the resource-intensive nature of AI models.
Get the App
System Requirements
Check the System Requirements page to make sure your computer can run Photo AI.
Find Your System Profile (Windows)
Find Your System Profile (Mac)
Installation
Connect the computer to the internet to install, activate, and update. Using Photo AI does not require it.
Our model files are double-zipped to safeguard proprietary data. This may trigger alerts from certain security applications that impede model file downloads. Consider temporarily disabling antivirus, firewall, VPN, or proxy before installation.
Click the installer below to install Photo AI on your computer:
Windows
Mac
If you do not own the newest version of Topaz Photo AI, download the latest version you own from the My Products page in your Topaz Labs account.
Activation
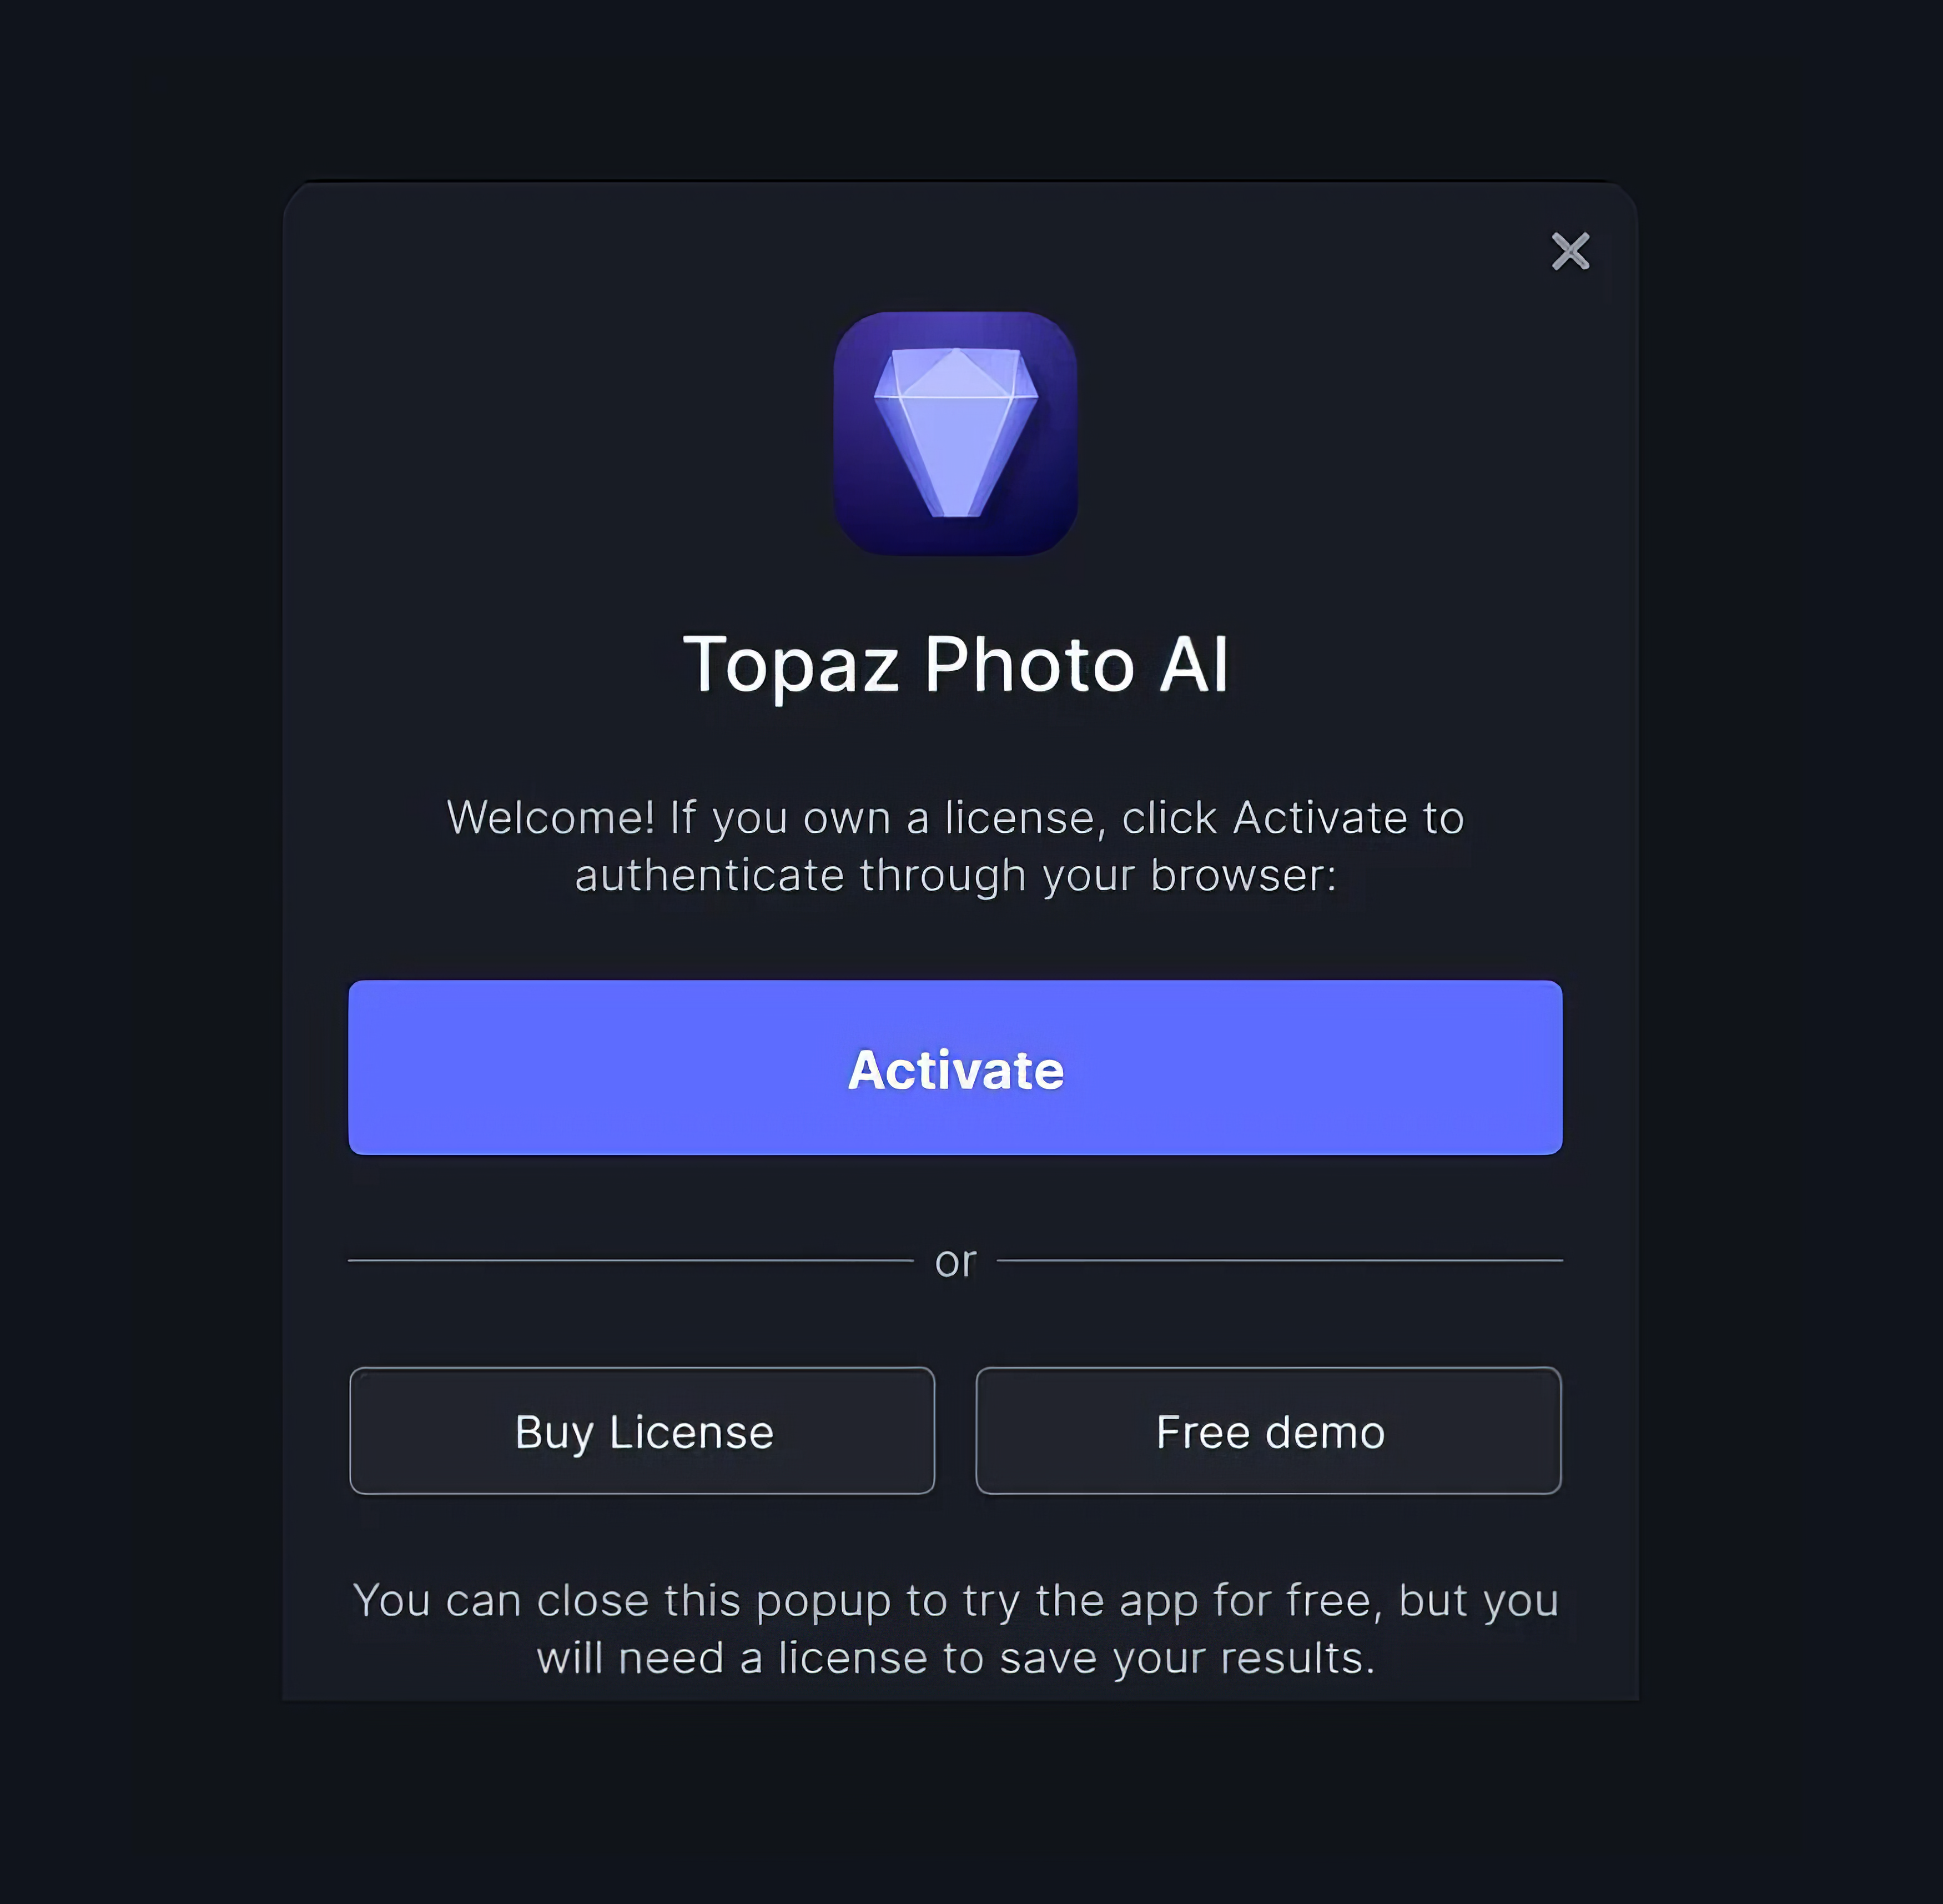
There is a free trial version of Photo AI. It has all the same functionality as the paid version except for exporting processed images.
There is no export quantity or duration limit. Install the application and select “Free demo.”
If you have a license, click “Activate.” It opens your browser, where you can log in with your account credentials.
User Interface
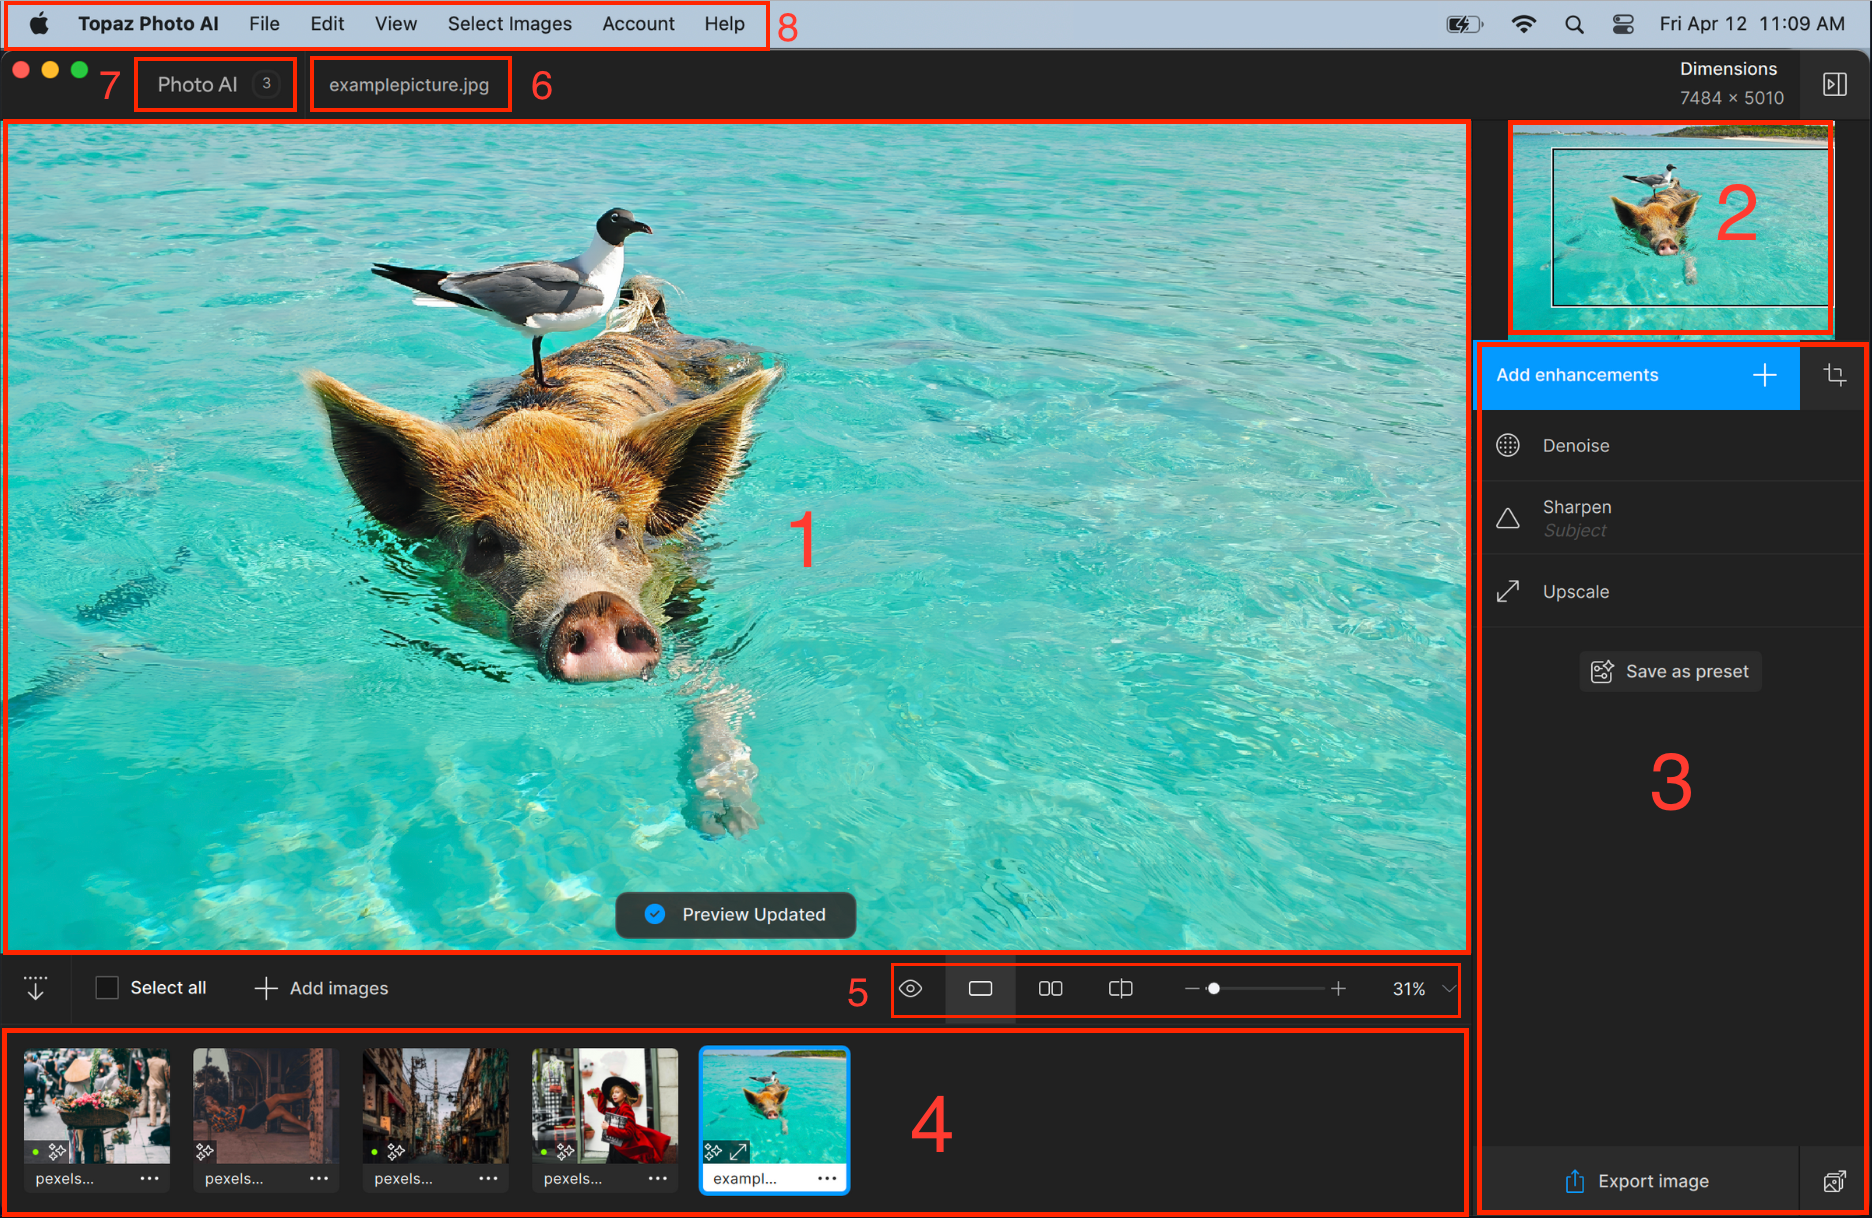
Take a tour and learn the different components of the Photo AI interface.
- Preview: view the processed result of your image here.
- Mini Preview: pan around or view the section of the image in the preview.
- Sidebar: manage the enhancements and their settings here.
- Film Strip: manage all the images that are imported in the batch.
- Zoom Options: Choose between single, split, and side-by side view and the zoom percentage.
- File Name: shows the input file's name.
- Version Number: shows the current version of the app you are on.
- Menu Options: Use these settings for file management, view customization, preferences, help, and account management.
When an enhancement is enabled, it starts with recommended models and strengths. Use the Controls tab to adjust the settings and the Selection tab to adjust where the edit is applied.
View the Workflow Tutorials article for more instructions on how to use each feature.
Export
Use Topaz Photo AI as a standalone product to control the file name, file format, and export location.
Queue
The queue provides a visual representation of processed and pending files for saving. Preview the file name, size, and format.
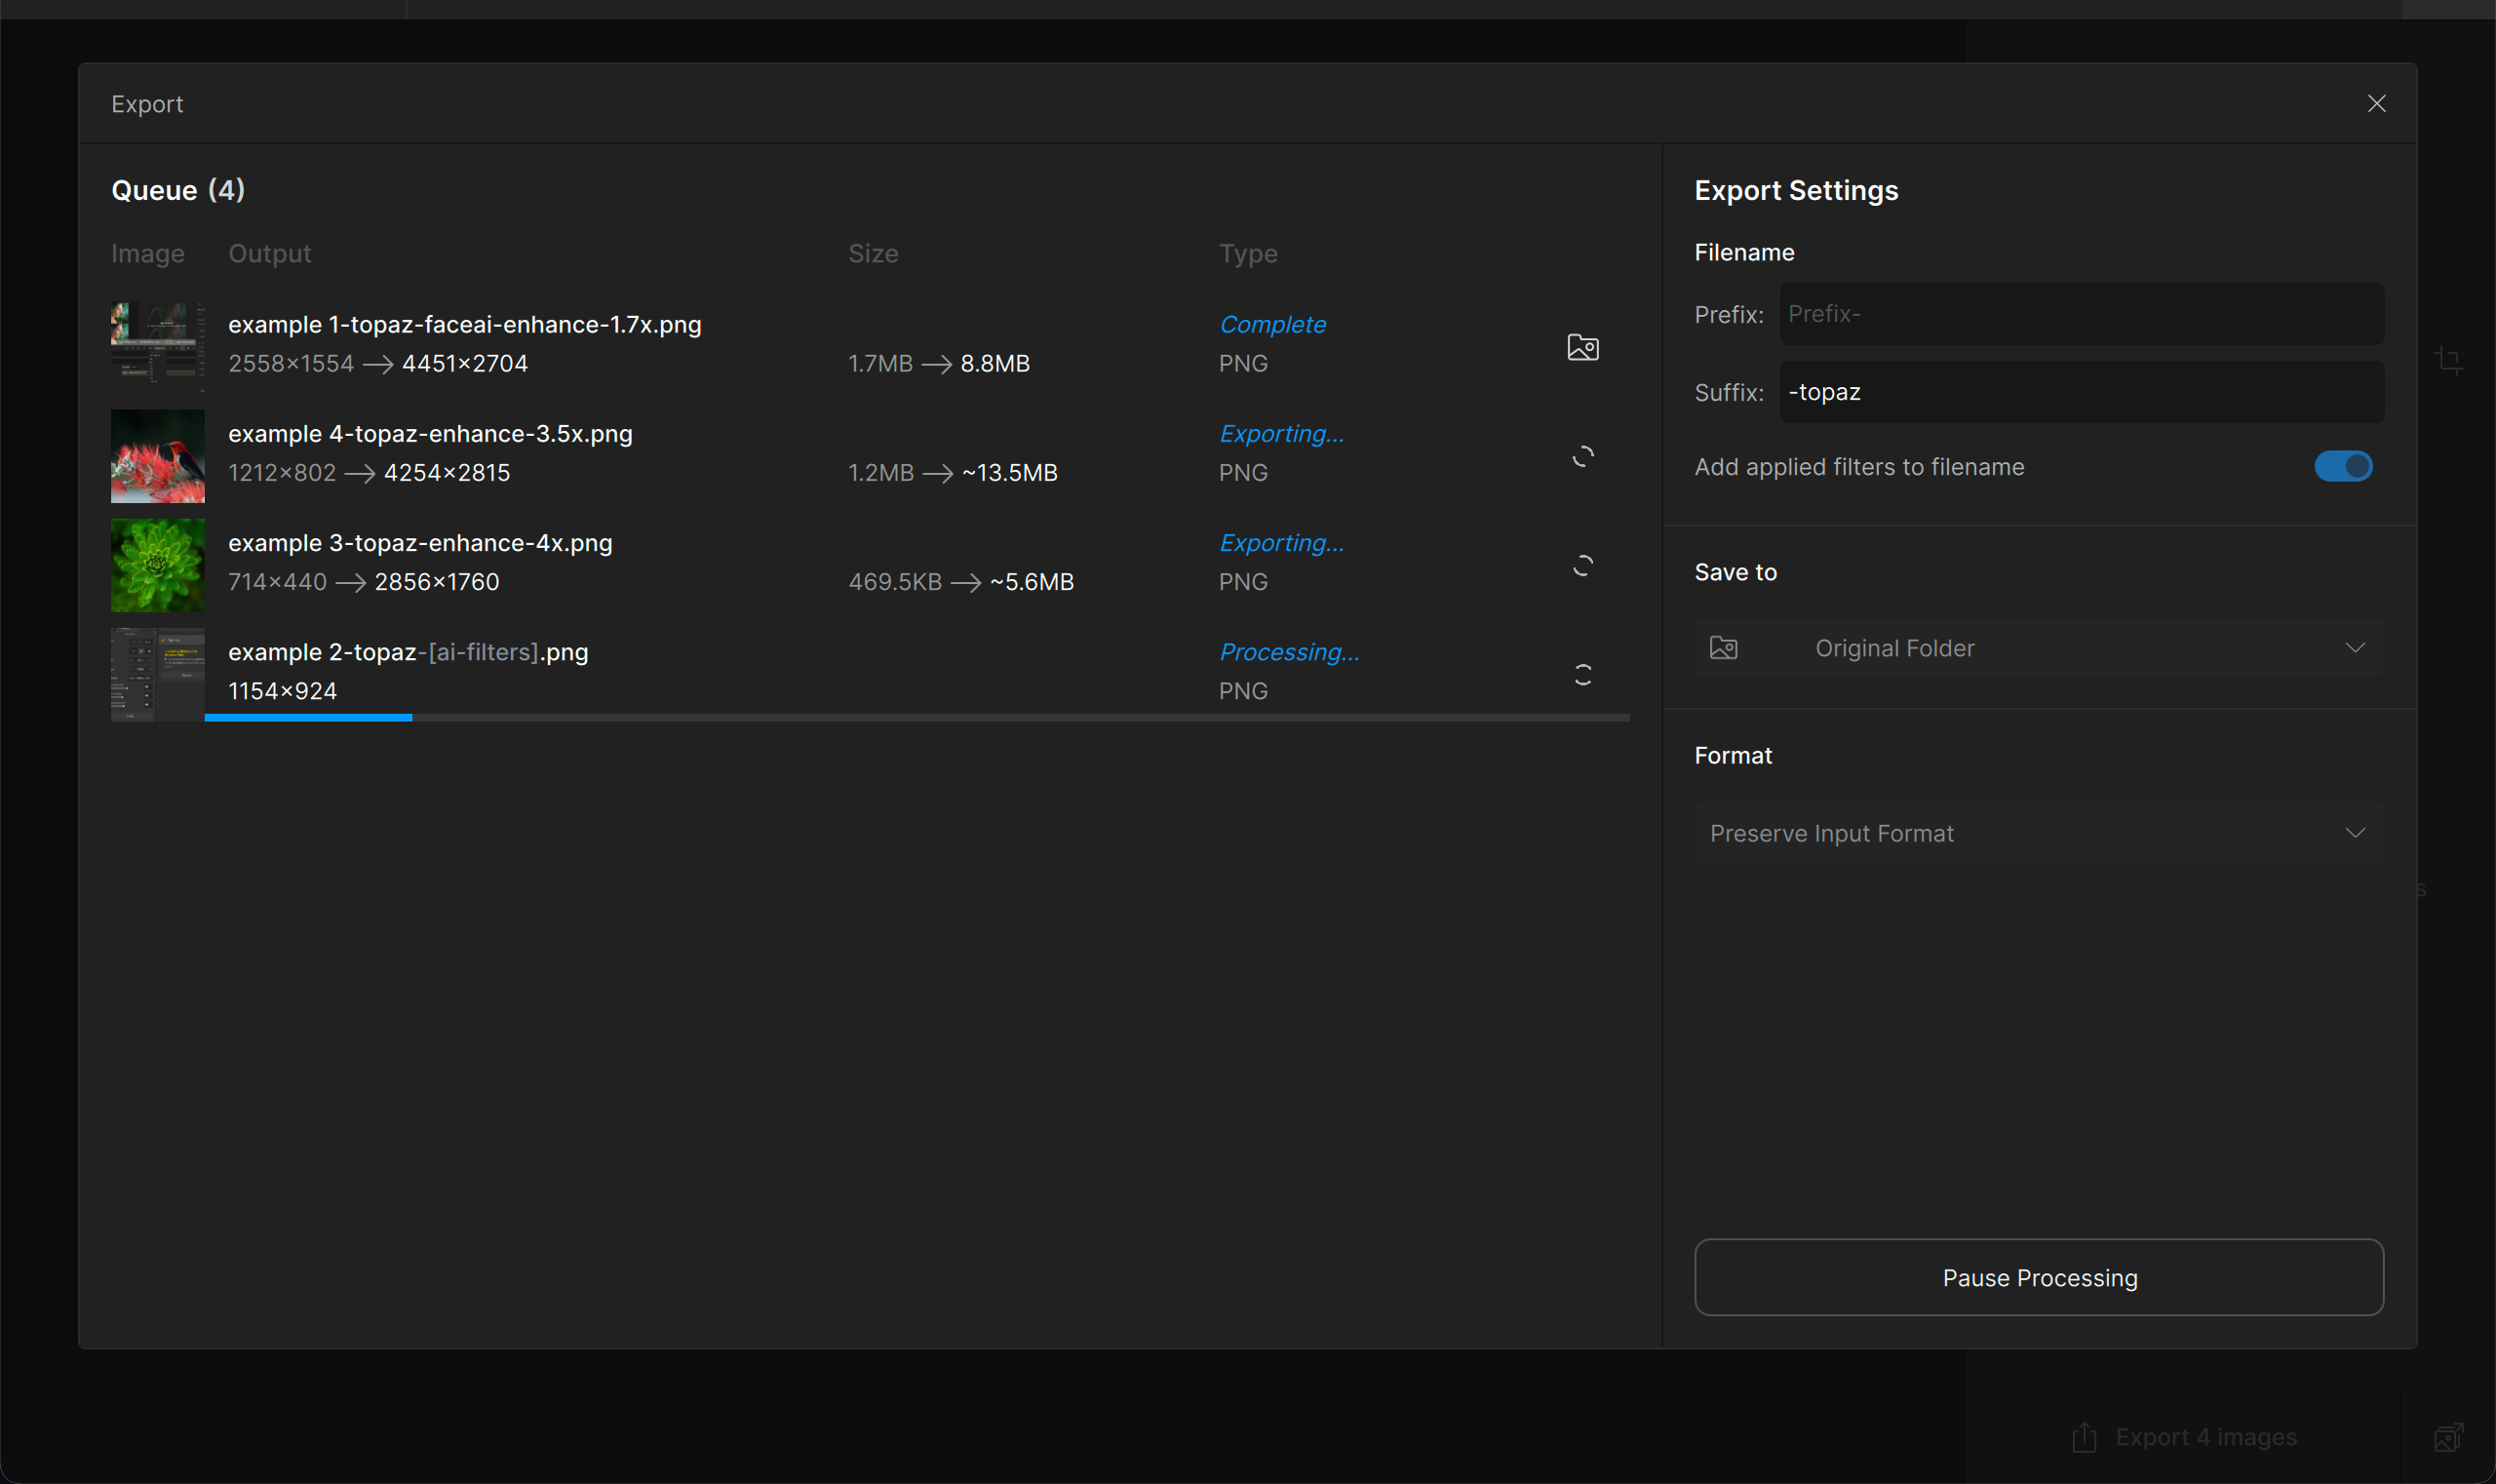
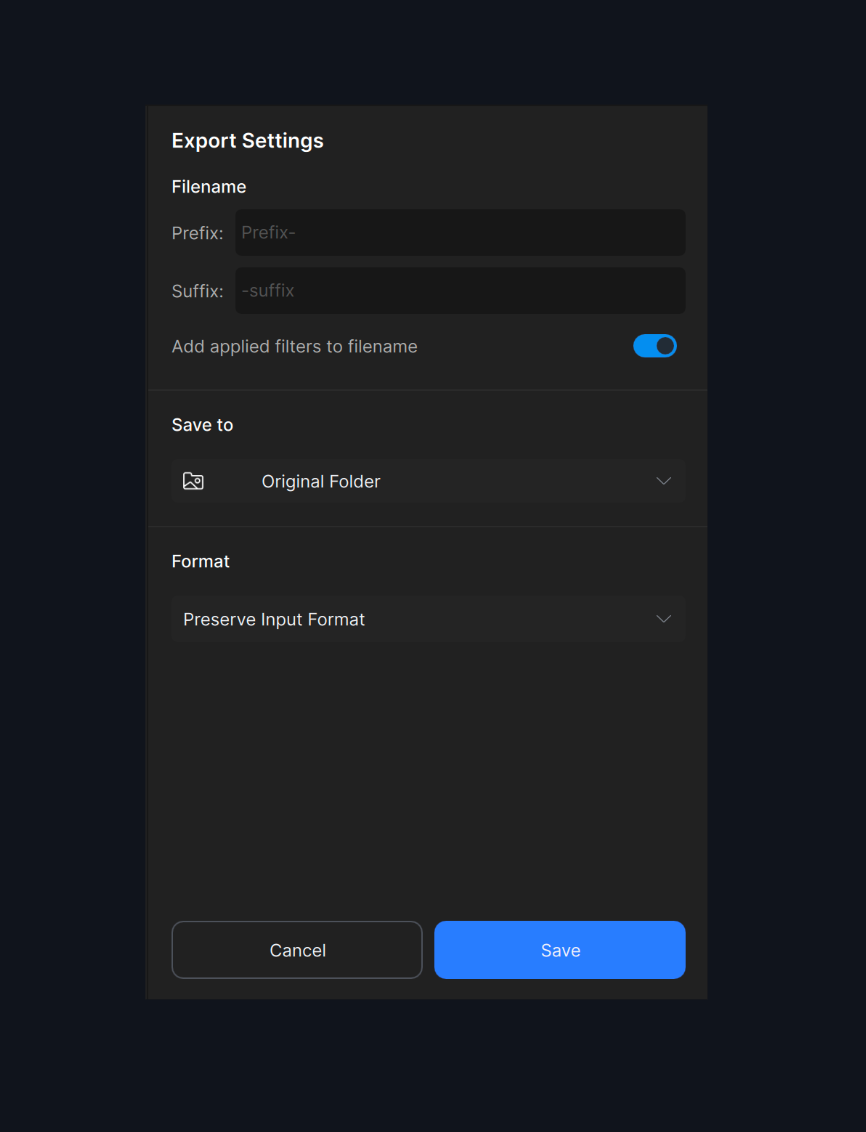
Export Settings
Click the Save Image button once you are satisfied with the edits. Use the export settings to customize the file name, file format, and export location of the final output based on your preferences or intended use of the images.
Read this article for more information on the Export process.
Next Steps
Learn how to use the full functionality of Photo AI.
Enhancements
Plugins
Need help?
To contact us directly, email support@topazlabs.com. Or, check out our community forum to see what other users are saying.