Preferences
Topaz Video AI allows you to customize various settings that can improve performance and the overall user experience.
To access this menu:
- Mac - Select Topaz Video AI > Preferences
- Windows - Select File > Preferences
Processing
Adjusting the processing preferences will control which hardware Topaz Video AI will use for:
- Previewing and exporting.
- How many resources Topaz Video AI is using.
- The number of parallel tasks that are being handled.
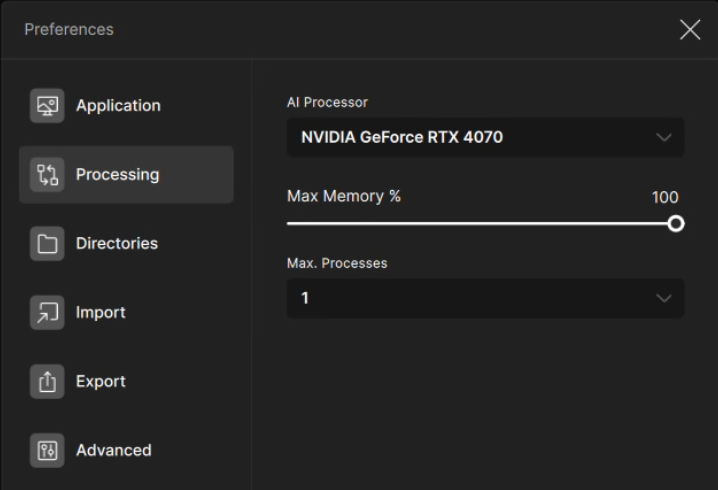
AI Processor
Determine which computer hardware is used to process, preview, and export tasks.
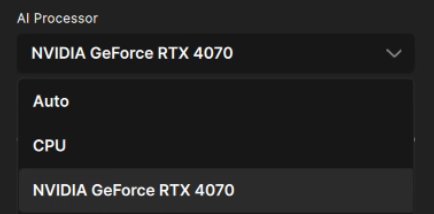
Note: Apple Silicon processors will not have this option available, and will always use a combination of the device's CPU, GPU, and Neural Engine.
Maximum Memory Usage
Specify the amount of system memory to allocate.
- High resolution videos require a large amount of video memory and will benefit from a higher maximum memory usage limit. However, it's also possible to exceed machine resources and cause errors, which will require lowering the slider.
- Increasing max memory usage may impact the performance of other running applications.
Max Processes
Select the number of tasks to run in parallel.
- The maximum number of tasks is based on the hardware specifications of your system and will be limited in the dropdown to avoid system instability.
Low Power Mode
Enable this option to reduce the consumption of machine resources in order to conserve power.

Directories
Adjust the directories preferences to control where the models, temporary preview files, and exports are saved on your machine.
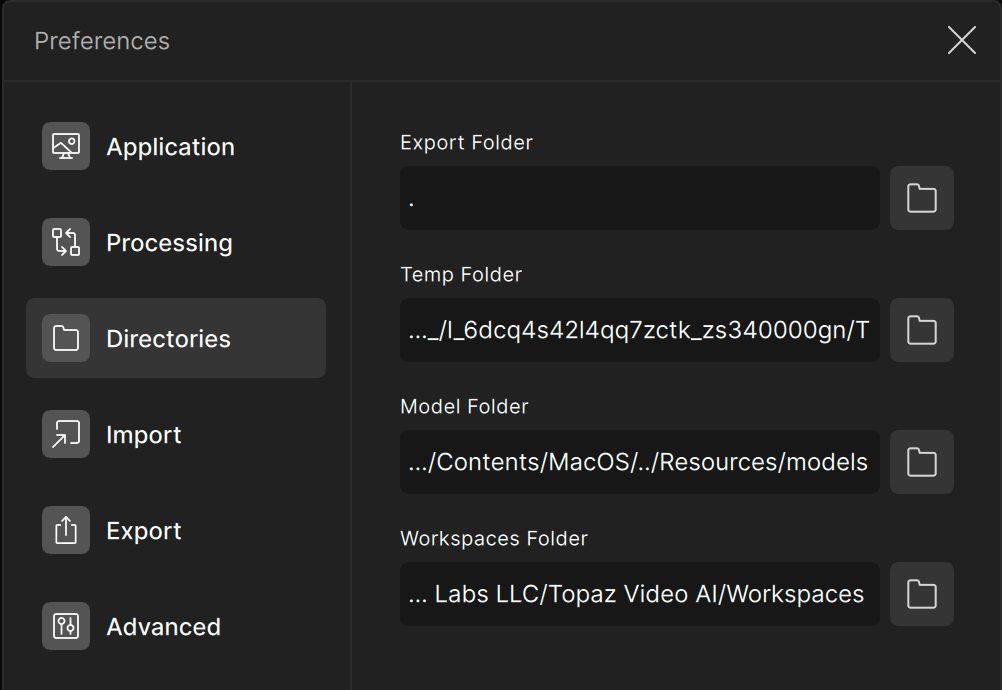
Model Folder
This folder contains the AI models and resource files required by Topaz Video AI.
Temp Folder
This folder contains generated preview files and other temporary files.
Export Folder
This is the folder where all exported files will be saved. The input folder (.) is the default location for exported files.
Workspaces Folder
This setting controls the default location for preview files and project files (saved as ".tvai")
Export
Adjust the output preferences to control the default encoder/ container, audio setting, and video export preview experience.
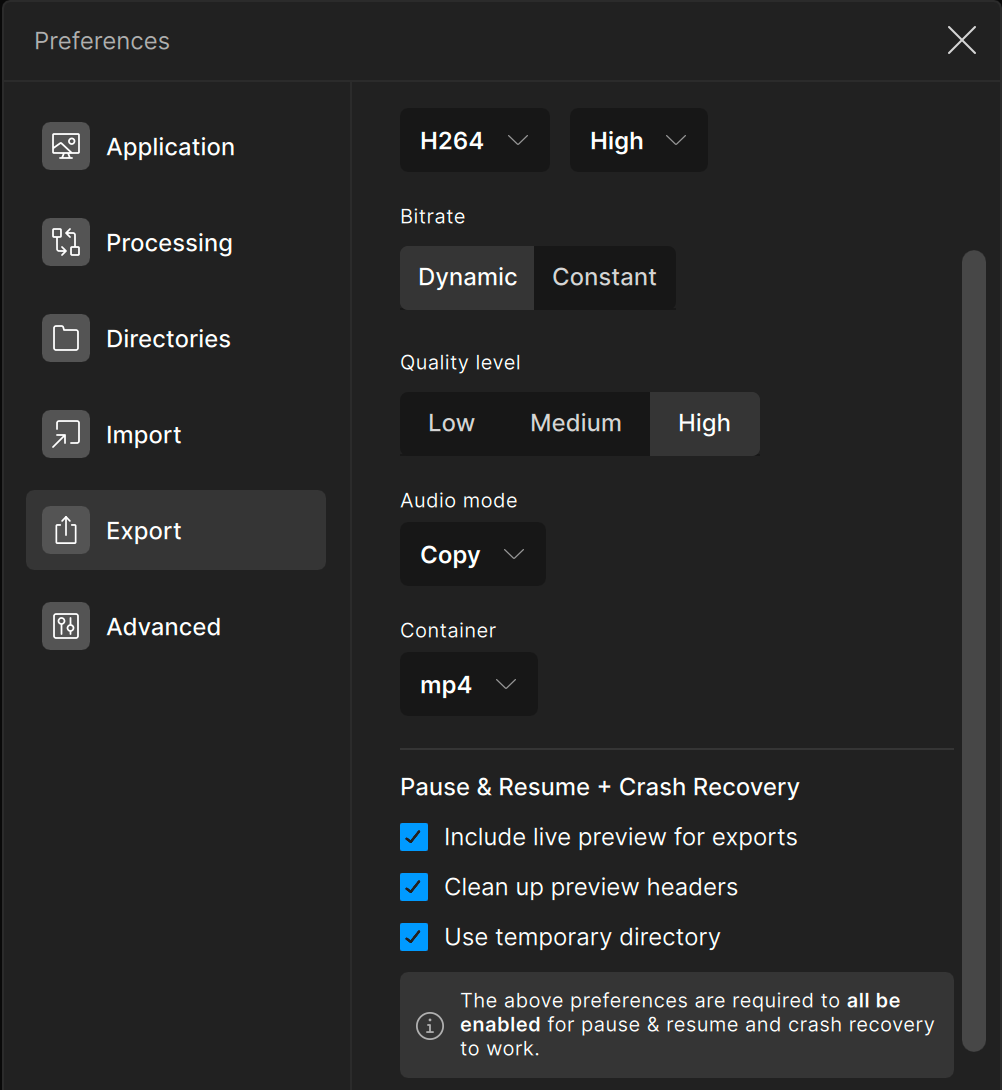
Encoder
Select the default video encoder to use when exporting files. Choose between video exports or an image sequence output.
Profile
This selection will change based on the encoder selected. For more information on the profile, please visit the encoders and containers page.
Bitrate
Select the default bitrate for exported video files.
- Auto allows the selected encoder to choose the optimal bitrate.
- Larger bitrate values will result in a larger file size of the exported video file.
- This setting is only available when using h.264 or h.265 encoders.
Audio Mode
Choose between copy, convert, or none.
We recommend leaving the audio mode set to the default selection of "copy" for most cases. Use "convert" when necessary for a certain output format. Selecting "none" will remove the audio stream.
Container
Choose the default file format for exported video files.
Include Live Preview
This toggle will allow you to control whether or not a preview is displayed in the in-app player. Disabling live preview will improve processing speed in most cases.
Clean Up Preview Headers
This section of the preferences controls how much memory the experience uses.
Use Temporary Directory
This setting determined where the preview files are stored on your machine.
Application
Alter this menu option to change the export preview experience.
- With Preview: Temp files will be created in the export location while processing.
- Without Preview: No temp files will be created and no recovery in case of failure.
- Use Temp Directory (with preview): A temp folder will be used to store the intermediate files.
- Keep Extra Headers (with preview): No temp files will be created and files may have issues with some editors/players.
Application
Adjust the application preferences to control the preview experience, processing speed display, default preset, and the collection of anonymous data.
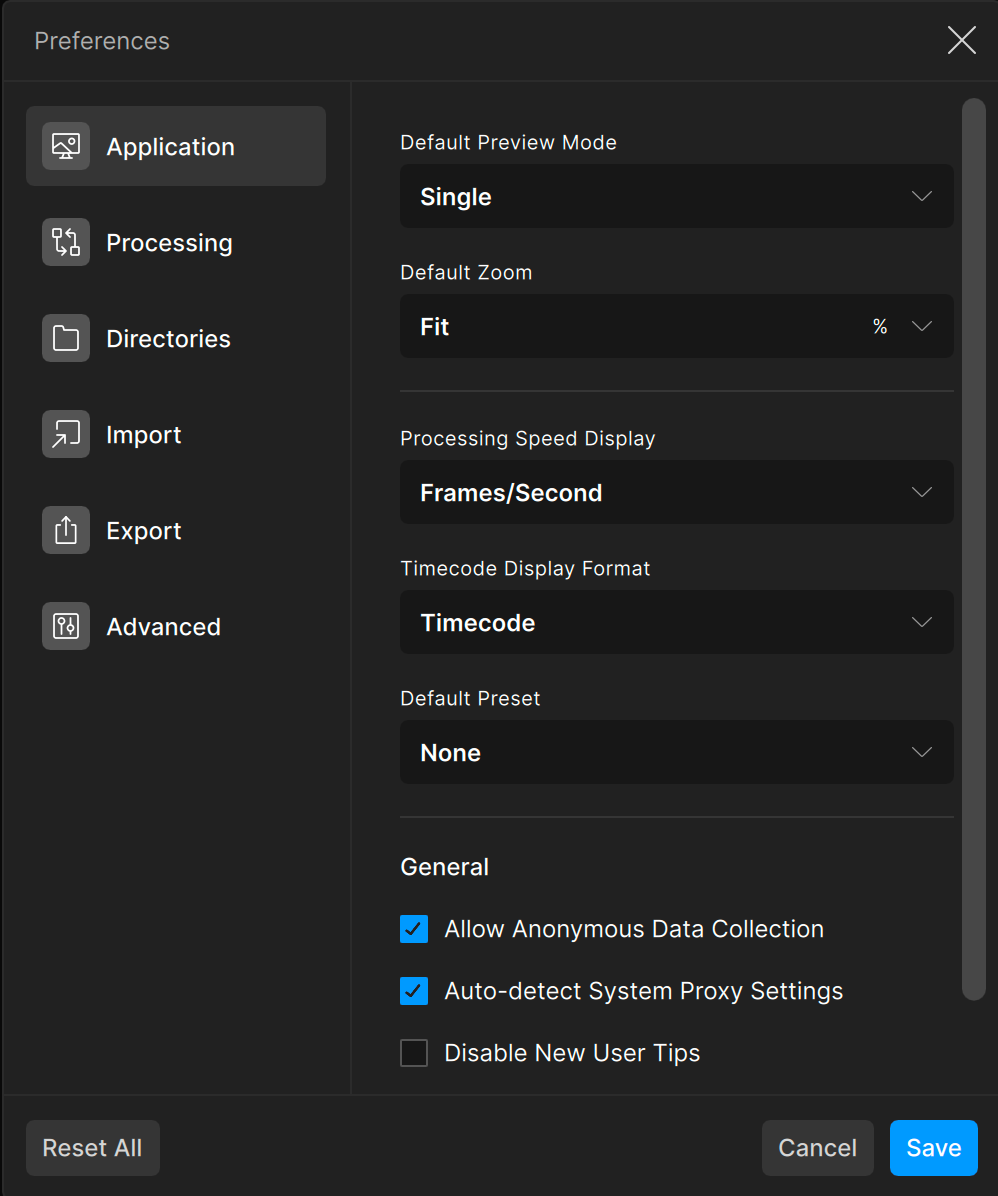
Default Preview Mode
Select the default view mode when initiating a preview task.
- Single will display the entire processed clip in the preview area.
- Side by Side will display the unprocessed clip in the left half of the preview area and the processed clip in the right half of the preview area.
- Split will display both the unprocessed and processed clips in the preview area and split them with a vertical bar that can be dragged left to display more of the processed video and dragged right to display more of the unprocessed video.
Default Preview Scale
Select the default zoom factor when initiating a preview task.
Auto-Play Preview
Control whether or not the preview plays automatically.
- Enabled is selected by default and will play preview automatically.
- Disabled will disable playback.
Processing Speed Display
Select the units to display when processing a preview or export task.
Timecode Display Format
Choose between displaying the timecode or the frame number.
Default Preset
Select a preset that will be applied upon loading an input video file.
- None will not set a default preset.
General
Allow Anonymous Data Collection
Choose whether or not Topaz Video AI collects anonymous data.
Auto Detect System Proxy Settings
Enable when connecting to the model download server through a workplace/university proxy.